|
Somehow I stumbled upon the coolest tech tool last semester. I believe I was looking for a way to share my case study analysis for tech use in the classroom. I wanted to use something visual to present the three examples I had found. I explored some of the resources we were given, and went down a rabbit hole looking for something free to use. When I want to try something out, I don’t like to pay for it, or even give out my credit card info for “free trial.” In these cases, I often search “free alternatives to (expensive tech tool).” When I did this, I ended up checking out Thinglink.com. This is a tool that allows you to upload an image (png or jpeg), a video, or a url image and make it interactive. While I was able to make my way through it enough to create the presentation that I wanted, I did not become an expert in any sense of the word. However, I spent enough time in it to give you a general idea of what it’s about, and to be excited about taking more time to consider how I might use it in the future.
As I mentioned, I discovered Thinglink while looking for a way to share my case study analysis in a visual way. Mainly, I wanted to record my reviews for the three examples I found, while giving the reader the ability to see a snapshot of the lesson, a brief description, and a link to view the example directly. I started by taking screenshots of each of the examples I found, and using collage app to get them all into one image. From there, I downloaded the image and added the icons for the recordings, more info, and links to the examples. Not bad for one long evening of exploration on the site and watching Youtube tutorials. It’s very user friendly! Here was my result: 
One difficulty I experienced was the sizing of the icons. Being as OCD as I am, I would have appreciated the guiding bracket images that Google docs and drawings gives you when images line up together or are centered. Another issue I had was the size of the final image for sharing. It was much smaller than I thought. Once I had done all that work, I was a little disappointed about that. Thinglink now has a fullscreen option, for an upgraded account of course.
Thinglink has so many more uses and features. Virtually any image can become interactive with customizable icons that are visible, or hidden and revealed by the hover of the mouse. Icons (activated by your hovering mouse) can be created to include a pop-up text box, hyperlink, video, gif, sound recording and more. Teachers can use any image for students to explore and learn from: maps, document screenshots, periodic tables, scientific charts, primary sources, ANYTHING. The possibilities are endless for embedding connections to additional resources, google docs/assignment pages, other apps, videos, and the list goes on. Want to learn more? Here’s a “Thinglink for Teachers” 3 minute Youtube tutorial (Rich Colosi Media, published March 12, 2015):
4 Comments
We are tasked with preparing our students to be college and career ready in the 21st century. Without a doubt, this preparation must include digital literacy and citizenship. Teachers have innumerable standards to teach, and a scarce amount of time and resources to do their jobs. Teachers need help to fit it all in. They need to be given time and resources. Since my work is with teachers, I will share how I could support my colleagues in their endeavors to teach digital literacy to their students. 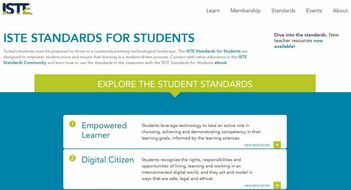 Image taken from: https://www.iste.org/standards/for-students To begin, I would want to utilize a new tech tool or app to present this professional development session on digital literacy, so that teachers might see something new in action that they might like to try. For example, I might create a quizizz to bring awareness of some digital literacy statistics from CommonSense Media, or even a few ISTE Standards as an opening activity. 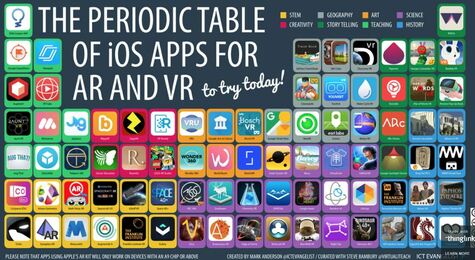 Image taken from: https://www.thinglink.com/scene/1010577192335179779 I do: Following the opening activity, I could use an application such as Thinglink (hover over images for text, audio, or links to pop up) to share a list of resources and tools by grade level and topic, such as the resources we have been given to explore over the past few weeks. I would select one or two per grade level to demonstrate, or better yet--ask a colleague to present one with which she is familiar. Teachers who are familiar with certain apps or programs could be identified as tutors. To balance out the content, I would want to be sure to provide resources that cover the range of digital literacy skills students need to be responsible learners, as well as technology standards for teachers and students, and finally tech tools for the students and teachers. We do: Give teachers ample time to explore the resources together during the session. 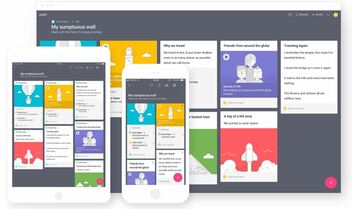 Image taken from: https://padlet.com/ You do: After our time together exploring tools and resources, I would use the Padlet app to have teachers share out their thoughts on the resources and plans for use. I would ask teachers to identify one tool or resource they can use the following week to teach digital literacy/citizenship to their students, or inform their own practice. 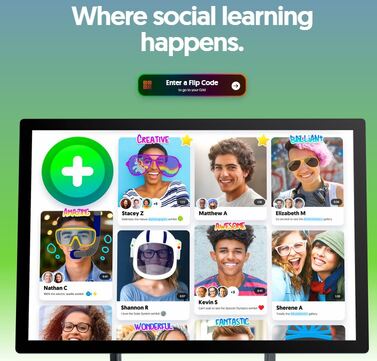 Image taken from: https://flipgrid.com/
Assessment: After two weeks, I would host a Flipgrid asking teachers to share a review of the tool or resource they used and what effects it had on their students work or their own practice. The idea would be to present teachers with examples, resources, modeling, and give them time to explore, construct meaning and practice. It would be truly wonderful to be able to carve out a little time at each staff meeting for these things! This week, we were assigned an article to read: “From the Mind’s Eye of the User: The Sense-Making Qualitative-Quantitative Methodology” by Brenda Dervin. I found it so hilariously ironic that this article was about sense-making, yet I struggled to no end in making any kind of sense out of the article itself. At first, I thought I would tackle this right away and get the assignment out of the way. I read the first page or so about 5 times and then put it away. I tried the first few pages again, then put it away again and did as much as I could on all the other assignments. I searched some images. I searched some reviews. I read the subtitles and looked at all the graphics. Then I used my day off to hunker down and push through it. As I read, I asked myself the following questions (apparently a very important part of sense-making): -Is this about database construction? -Is this about research? -Is this about meta-reality? -Is this about psychology? -Is this about sociology? Although there were sections of the article that seemed to quickly veer off into a different direction, I think the author’s overall intention was to explain the process of sense-making, and perhaps its potential value to research. As I read, to help myself remember things that I actually understood, I highlighted and took notes. The main theme I was able to identify was the description of the sense-making process. Sense-making is an individual process that humans use to gain information, solve problems, understand. Each person constructs their own understanding through this process that is unique to his/her own experience. Each path to each new understanding is as different as a snowflake. In my search for images, I chose the simplest one I could find: 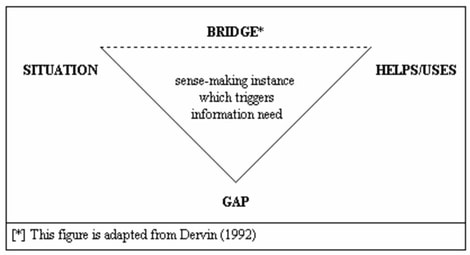 Image taken from: http://www.cios.org/EJCPUBLIC/009/2/009215.html
I like this image because it demonstrates the main idea of the article and because it is clear. This best demonstrates how I bridged the gap between confusion about this article and making sense of it! So very meta. In fact, I don’t think I’ve ever read anything as meta as this in my life. If I had the job of helping high schoolers, or even adults, through this reading, I’d definitely have to read it several more times myself. Perhaps I would read more of her work to gain a better understanding. My first thought is that I would definitely chunk it into small sections and go slow. I would use the image I chose and reflect back on it frequently to reconcile each section to the main idea. I would probably search out articles, videos, podcasts by others on the same topic to see if anyone else was able to explain it more clearly or simply. I think this process was a great experience for teachers to understand how students might feel when they are asked to read something that is way above their lexile level. Just the fact that I put it off so long because it was difficult helps me sympathize with students who often give up when things get too hard.  Image taken from: https://innovated19.sched.com/ Saturday, February 9th, 2019. What every teacher wants to do on her day off: Go to a teaching conference? If it’s this one, YES! This is my favorite conference to attend each year. NapaLearns makes this a no-brainer: Get paid $150 to attend a wonderful day filled with fabulous, realistic and “do-able” ideas from experienced presenters. AND you get coffee, pastries, snacks, lunch, and a raffle at the end! What more could a teacher ask for in a conference? I’ll tell you what: a hilarious, energetic, and genius keynote speaker. Done. 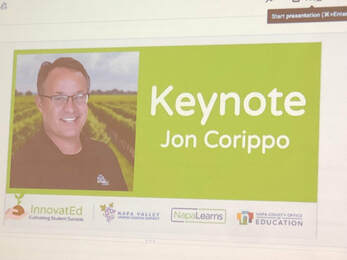 Jon Corippo from CUE.org launched into his dynamic menu of protocol style lesson ideas to start our morning off. What I love about him is his humor, and low-prep/high interest innovations such as “Iron Chef” and “8 Parts Protocol.” These are classroom web/online protocols, or routines, that are taught frequently until students become familiar with them. Then, the protocol stays the same, while the content changes. Students are able to focus on the new content because they are already familiar with the protocol. This keeps prep to a minimum for the teacher, and grading is a snap because responses are digital and easily viewed at once. He’s recently authored a book called EduProtocols, and I can’t wait to read it! 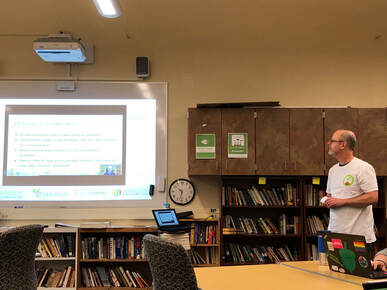 First workshop of the day for me was “Screencasting Made Simple” with the wonderful Scott Marsden. I have to admit that this was the second time I took this course. I took it last year, and since I didn’t practice it, I forgot what I had learned. Additionally, I apparently installed Screencastify and also forgot! This goes to prove that you need to practice your new skills, or you lose them. Now that I am in the Innovative Learning program at Touro, I have had many reasons to learn how to create screencasts, and more than a couple of opportunities to practice the skill. This made it great to take Scott’s workshop again to deepen my learning. We were able to try out some fancy microphones and compare Screencastify features with Screencast-O-Matic’s, all with Scott there to guide us. 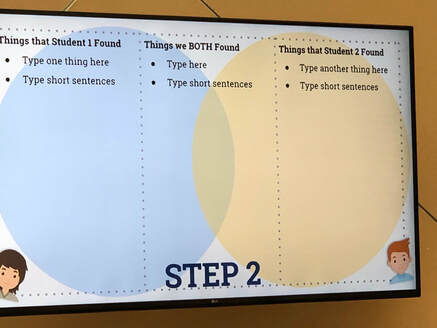 For my second session, I jumped at the chance to spend more time learning from Jon Corippo, for “Unstructured Time with Jon.” During this session, he showed us an innovative way to get ALL students to respond to a resource in pairs, using a protocol called “Cyber Sandwich.” The resource could be any educational prompts that you want students to compare/contrast. All students take notes on their source on a google slide, and then compare and report out on similarities or differences on a new slide. Then these slides are shared out with the class and perhaps combined to create whole class findings. We also practiced using the Quizizz app as a quick way to improve student success with memorization-type standards/skills. He pointed out that this app allows students to work at their own pace (unlike Cahoot), and quickly move to the top of the class based on performance. The app gives you data on the most difficult questions, length of time taken to answer, and more. When you give the same quiz again, students are highly motivated to perform better and most often do! Again, very little prep and no grading for the teacher--especially when teachers work together to create quizzes. 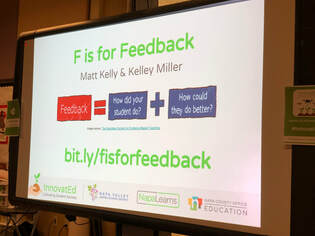 My next session was “F is for Feedback.” This was a great session geared toward the importance of feedback, and how to give students the skills to provide quality feedback to one another. I really enjoyed the connection to John Hattie’s work, and how feedback is one of the most effective tools for student growth. The rubric process introduced in this workshop would surely hit two birds with one stone. Students would learn to give accurate feedback to their peers AND through the process, instantly be given crystal clear expectations for their own work.
Finally, the last session of the day for me was “Mass Individualization with Merge Tools.” I have never been able to wrangle any skill involving merging--so I decided to feed the growth mindset voice in my head on this one. While I was able to follow along step-by-step successfully, I honestly doubt I would be able to reproduce the results I got in this workshop. Perhaps I selected something outside the range of my ability level. During the workshop, we spent time in Google Sheets (I should’ve know at that point that this was out of my league), and fooled around with two add-ons for Sheets called “FormMule” and “AutoCrat.” Both seem like wonderful apps. I just don’t think I’ll be ever able to use them on my own. Then again, I might find myself back in a year building up these skills just like I did with Screencastify! This week, we explored a few resources for teaching our students about Digital Citizenship: Common Sense Media, Google’s Be Internet Awesome, and Stanford’s History Education Group. Each site has a VAST, yet distinct, selection of resources that are useful to students and families in the area of Digital Citizenship in general, and as it relates to digital communication. Stanford’s History Education Group offers a link to “Civic Online Reasoning” on their site. It seems to be very accurately named, because this resource, geared for middle school and up, is designed to initiate critical thinking about online articles, photos, advertisements, and social media claims. Each category resource offers a task, overview, and rubric. The task involves presenting an example of an online photo with a claim, or an advertisement, and then asking the student to evaluate whether it could be legitimate or not, citing evidence or reasons for their conclusions. The overview gives the teacher background and reasoning, while the rubric will identify levels of responses that indicate where students might be in their development of civic online reasoning: mastery emerging and beginning. One way that I might use this site to make digital citizenship personal for the students at my school is to share these resources with my 4th and 5th grade teachers. While the site is geared for middle schoolers and up, I think these activities could be modeled as a whole class activity, with the teacher selecting appropriate modules and then working through them together. Teachers could model a response, and students could be given the sample rubric responses and then attempt to sort them into the levels of master, emerging, and beginning, in groups or pairs and then review as a whole class with rationales. Being able to distinguish legitimate information from fake or biased information will help students to communicate digitally from a much more stable standpoint and prevent so much misunderstanding. Google’s Be Internet Awesome site is geared for younger students, grades 3-6. The site offers lessons in five areas of Digital Citizenship:
This resource could be used to make digital citizenship personal for our students by sharing these lessons with my teachers. I could offer a lunchtime PD session where I share these lessons and games with teachers and we could explore “Pear Deck.” Google has put all the Digital Citizenship lessons on google slides using the add-on “Pear Deck,” which allows students to be formatively assessed during the lesson presentation. I think this option makes the lessons easy to customize for the grade level and students (slides can be added, removed, and modified). I watched some videos on how Pear Deck works, and it seems really engaging. This would be really fun to play around with teachers and learn together. The great thing is that Google offers Pear Deck slides for every Digital Citizenship topic, covering digital communication, information safety, and critical thinking about online information Image taken from: https://beinternetawesome.withgoogle.com/en_us/slides  Image taken from Google's Be Internet Awesome Curriculum: https://beinternetawesome.withgoogle.com 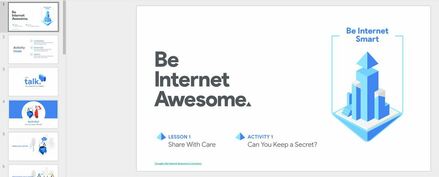 Finally, I saved my favorite for last: Common Sense Media. This is an awesome resource for teachers, but I have been using it as a parent for many years. The only negative thing I can say about Common Sense Media is that sometimes the resources are so plentiful that one can get lost. For this week’s learning, I decided to go ahead and let myself get a little lost. I clicked on the “Educators” tab at the top, and then “Digital Citizenship” to find their offerings on the topic of Digital Communication. Image taken from: https://www.commonsense.org/education/scope-and-sequence 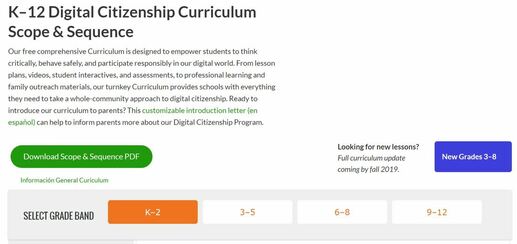 If you click on “Find a Lesson,” you are able to filter by grade level (K-12), or by topic. Since I am not a classroom teacher, I didn’t feel any “sparks” for these lessons, so I went back to their main page for educators and clicked on “Toolkits by Topic.” There are several toolkits available on different Digital Citizenship topics, but I was quickly interested in this one: Image taken from: https://www.commonsense.org/education/toolkits  This toolkit is awesome. This is my favorite example of how digital citizenship could be made very personal for teachers, students and families at my school. In the free webinar that describes how to organize a “#devicefreedinner” event at your school, Kelly Mendoza (director of learning and engagement at Common Sense Education) says, “...part of being a digital citizen is having media balance in your life and making sure that technology is a supportive tool, and not a distraction in a way that is detrimental to your relationships.” The toolkit provides classroom activities and parent tips on topics such as:
|
Jona SandauI'm a student in the Innovative Learning Master's Program at Touro University. I'm really excited to make a difference for my students! Archives
March 2019
|
 RSS Feed